
Unknown96
Exalted Member
Hello Everyone,
In this tutorial I will walk you trough the steps of compiling a TrinityCore 3.3.5 server, but hey I know there's a lot of different compiling tutorials out there that are great and have awesome instructions of the basic steps that leads to a perfect compilation error free. So what does really make my tutorial different then another you can find on google of 2 minutes searching? Easy, Error fixes. I myself once attempted to compile a server and ran into a load of errors in both CMake and Releaseing so in this tutorial I am going to show you how to successfully compile a server but in case problems occurs I will also make a few pointers and such on how to solve these issues and continue with your compiling and I will also explain what the different processes and programs are doing! Not to mention that I will attempt to always update this thread with new content and information. Also I include Eluna, an Emudevs production that basically is an Lua Engine for TrinityCore. I also include an optional solution called Forge that will download and install every program required for you. I include these new items because I feel like they are methods someone could use and some methods can be easier to handle if this is your first attempt to compile a server. And for some it can be a good perk, something that you can use to make your server more unique and fun.
I've also included an optional step [Step 3.3 : Optional Eluna Engine], if you feel like you don't want to mess with this its completely understandable and nor is it required to have. However it can be benefiting in the future if your planing on adding Lua scripts for any reason.
This is the steps I will take you trough!
Code:
[SIZE=2][COLOR="#FF0000"]
Step 1: The 8 Requirements
    Step 1.1 : Forge                // An optional solution.
    Step 1.2 : GitExtensions
    Step 1.3 : Microsoft Visual Studio Express 2013
    Step 1.4 : MySQL Server Community Edition
    Step 1.5 : Database Development Tools
    Step 1.6 : Boost
    Step 1.7 : CMake
    Step 1.8 : MySQL Development Files
    Step 1.9 : OpenSSL

Step 2: Forge Installment and Download

Step 3: Git and Preparations
    Step 3.1 : Preparations
    Step 3.2 : Bit
    Step 3.3 : Optional Eluna Engine

Step 4: CMake
Step 5:  Releasing

Step 6: Installing and Placement [AGAIN!]
   Step 6.1 : Authserver.conf
   Step 6.2 : Worldserver.conf

Step 7 : Database
   Step 7.1 : DB Connect and Structure
   Step 7.2 : World Database
   Step 7.3 : World Data Filling
   Step 7.4 : World Updates

Step 8 : Bonus
   Step 8.1 : Server Name and Realmlist
   Step 8.2 : Account Creation

Step 9 : Error Fixes
   Step 9.1 : CMake Errors
   Step 9.2 : Database Errors
   Step 9.3 : Connection Errors
   Step 9.4 : Eluna Errors
[/SIZE][/COLOR]
Lets begin!
Step 1 : The 8 Requirements!
/* Note that this step is only relevant if you do not have ALL the necessary programs installed and settings in order to compile a TrinityCore Server! */
If you don't know if your running a 32bit or 64bit, simply press start then right click computer and press "properties" now a window shall appear that contains the information [Example. System Type: 32bit]
Further information about where or how to install these programs will be listed bellow!
UPDATED CONTENT
There is a newly developed application brought by [MENTION=1024]Neccta[/MENTION] that can download and install all these following files automatically for you. If you choose to the Forge tool that would say or download and install everything manually. Check out updated version of Step 1.1 Forge down bellow.
Code:
1. GitExtensions (Includes : Git, MySYSGit, and KDiff - be sure to install all three)
2. Microsoft Visual Studio Express 2013 (For Windows Desktop)
3. MySQL Server Community Edition (Use the most recent version)
4. HeidiSQL (Recommended, any database tool works.)
5. Boost
6. CMake
7. MySql Development Files
8. OpenSSL (Win32 OpenSSL that is NOT the "light" version. Example: Win32 OpenSSL v1.0.1m)
Forge
About
Forge for Windows is a newly developed application written by [MENTION=1024]Neccta[/MENTION] . Its an TrinityCore Environment setup. That basically means it would handle all downloads and installations of every program that you'd need to compile your own TrinityCore server. Its a very simple tool that's both quick and efficient. It comes with a set of commands that look like this
Code:
[U]Download Commands[/U]

Download.MySQL
Download.OpenSSL [Architecture]
Download.VCRedist [Architecture]
Download.Git
Download.Boost [Architecture]
Download.VisualStudio [Version - Optional]
Download.All [Architecture] [Version - Optional]

[U]Install Commands[/U]

Install.MySQL [Architecture] [Password]
Install.OpenSSL
Install.VCRedist
Install.Git
Install.Boost
Install.VisualStudio
Install.SetVar
Install.All [Architecture] [Password]

[U]Git Commands[/U]

Git.Clone [SaveTo Directory] [Branch] [URL]
Git.Update [Repository Directory]

[U]Build Commands[/U]

Build.Cmake [Architecture] [Build Directory] [Repository Directory] [Version - Optional]
Build.VisualStudio [Build Directory sln] [Configuration] [Version - Optional]


[U]Download and Install Arguments[/U]

Architecture - x86 or x64.
Password - Set the MySQL password.
Version - The default version is set to 2013, set to 2015 to use the latest Visual Studio.
SetVar - This will set the system environment path for Git and Cmake. It is normally called after the All command.
And more, check out his thread to learn more about his application.
Download And Placement
You can download Forge from the creators Dropbox [HERE] and you choose where you want to place the file yourself since it doesn't relies on any specific path placement at all.
1.2 GitExtensions
About
GitExtensions are used for gathering the TrinityCore 3.3.5a information/data that you will be using for your new server, this data will be pulled from a website automatically by the program when we give it the command.
Download And Placement
If you don't already you can enter the website to download GitExtensions by pressing [HERE], note that you need to include the Git, MySYSGit, and KDiff. You will get the offer to include these programs when installing GitExtensons. Also I would recommend you to place GitExtensions some where easy to remember within your harddrive etc (C:\Program Files).
1.3 Microsoft Visual Studio Express 2013
About
Miscrosoft Visual Studios will be used for the compile itself, releasing the files that will be your final server in the end. This program can also be used for view and edit server files and is very user friendly in my opinion.
Download And Placement
You can download this program [HERE] but as you probably noticed kinda fast is that there is a lot of different downloads, well follow my instructions and everything should go well!
First, Scroll down until you see the title [Visual Studio Community & Express], now try to locate [Visual Studio Express 2013 with Update 4 for Windows]. Now you have found the right program we want to use, now chose what ever language you wish to use by selecting it in [Download Languages] and press Install Now!
Note that this programs directory does not make a big difference at all, you can place this program where ever you wish like, no recommendations.
1.4 MySQL Server Community Edition
About
Basically just a required binary/library but we need the full folder in order of our computer to be able to use and make sense of the binary/library itself.
Download And Placement
You can download the program [HERE], If you scroll down you should find a download button saying [Windows (x86, XX-bit), ZIP Archive] under MySQL Installer 5.6 for Windows, just download the program that fits your computer (32bit/64bit) and place it some where you at least remember, because we could need to enter this folder in order to solve an error if it occurs for you.
This installation can cause many issues if its done wrong, therefor I would like you to read and view this thread real quick since it has great information about how to correctly install MySql Server
MySQL Sever Thread - Credits to [MENTION=1]Tommy[/MENTION]
1.5 Database Development Tools
About
There is a lot of different Database Development tools, a Data Development Tool is used for, well you guessed it developing your database.There is a few different programs you can choose here and really its all up to you and your liking, here is the most recommended once to use
HeidiSQL
HeidiSQL is very user friendly and the best choice according to me for beginners because of its layout, effectiveness and simplicity also its beautiful for the eye, if you wish to download this program, press HeidiSQL above and select Installer at the top of the page

Img url : http://en.academic.ru/pictures/enwiki/72/HeidiSQL_main_screenshot.png
SqlYog
SqlYog is a Database Development Tool I actually never have tried myself so I do not know really anything about the program itself, but it is one of the 3 recommended Development Tools by EmuDevs/TrinityCore them self and you can by pressing SqlYog above and select the system type your running.

Img url : http://www.zwodnik.com/media/images/sqlyog_windows.png
Navicat For SQL Server
This tool is well known around the web for it great functionality and productiveness even thought its a bit more advanced Database Developer Tool its worth trying for the more experienced people, Navicat also has a smooth layout with and great program tools!
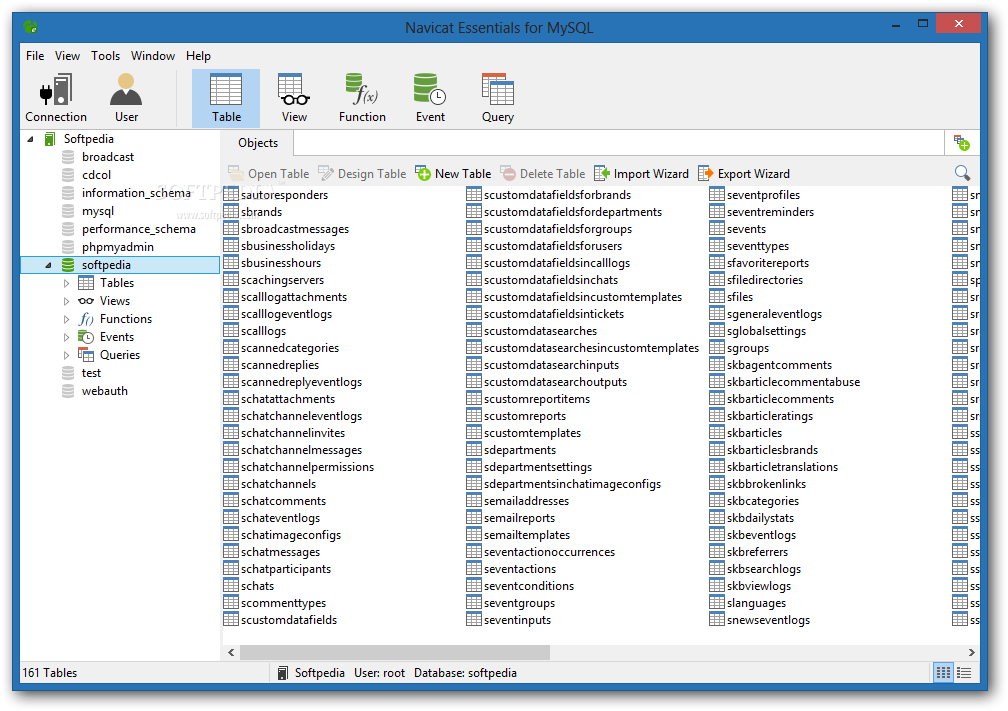
Img ulr: http://i1-win.softpedia-static.com/screenshots/Navicat-Essentials-for-MySQL_1.png
1.6 Boost
About
Boost is a prebuilt Windows Binary matching your platform that allows your computer to handle the information without running into any unknown territory basically, that's why this binary is included to your computer.
Download and Placement
You can either download the [32bit] or the [64bit] it all depends on your computer, also I really recommend placing this folder some where local such as [Example. C:\YourComputerName] because of its easy access and localization.
Installation
First you'd need to have the file downloaded and placed at the suggested location, then enter your Control Panel and press System and Security and after that press Advanced System Settings (This requires administrator user to access!) When you have accessed the next window you should press [Environment Variables...] > New User Variable then fill in the information shown in the image bellow and press [OK]

Img url: http://collab.kpsn.org/download/att...rsion=1&modificationDate=1406047952000&api=v2
1.7 CMake
About
CMake is one of the main programs used in compiling a server, its used for converting the information/data that we gather with GitExtensions and converte it to a more buildable/compilable data, this is one of the places errors most likely occurs.
Download and Placement
You can download the file [HERE], just scroll down until you see [cmake-3.2.X-win32-x86.exe] and download the file, there is not suggested placement of this program since we won't be needing to go to the program folder itself, we will stick to the program only.
1.8 MySQL Development Files
About
Wait whaat?! Didn't we download MySQL already? Yes we indeed did, this how ever is just includes to MySQL Server Community Edition that we need in order not succeed the compile itself, its a very small file that only contains 3 folders.
Download And Placement
You can download the file [HERE], and you should after that place the folders downloaded into your MySQL Server Community Edition folder, merge the includes folder if there already is one and just place out the lib_64 and lib_32 folders inside the MySQL folder. Note that you need to add both to avoid errors no matter what your System Type is.
[EXAMPLE]

Img url: http://s17.postimg.org/rri1aqg2n/Screenshot_1.png
1.9 OpenSSL
About
Finally our last program on the list! I know you feel the joy, we are closing in our goal after all that installing you might want a break or at least your computer wants one. How ever OpenSSL is another and almost the last binary/library folder container that we will download, but it indeed is the last one we will download in order to complete the compile.
Download And Placement
You can get your final download [THERE] since there [HERE] button was broken, unfortunately. How ever we always got a [THERE] button to spare! And for placing OpenSSL I would recommend you to place it some where you could remember its location easly since we will possibly return into this folder to prevent errors or fix errors in the future.
Step 3 : Forge
So you just downloaded Forge huh? Well then lets take the quick and easy step forward with this application.
The first question you'd need to ask yourself is, do you already have any of the programs required to compile a TrinityCore server? If you'r unsure please look at the eight requirements again.
Okey so lets get going with this. When you first open up Forge.exe you should type this line in that is writen bellow, if you do not have any of the eight required programs installed as I am assuming. If you do you can hand pick out the files you want to either download or install with the commands that I mentioned above. Lets continue.
Remember that Architecture stands for system type and you have x86 and x64 to choose between. x86 being 32 bit and x64 being 64 bit.
When everything is done downloading enter this into your Forge.exe
And once again Architecture is your system type as before. And the password is for your MySQL so enter whatever password you wish to have.
//NOTE//
Currently there is a defect in forge where it doesn't work correctly with the password set however the download is highly successful. The only effect this have is that your password will not be set after the download is complete and an error message during the download about MySQL however you can just ignore that for now. It might even be fixed by the time your reading this.
Step 3 : Git and Preparations
3.1 Preparations
Finally we have arrived to the part where the compiling process will begin but before we start compiling we should need a few folders to place our server in and I can highly recommend placing the server either on your hard drive (C:/) or on your desktop.
Start by making a new folder called TrinityCore or anything else really, second of I want you to enter your new created folder and create a new folder called "Compile" and a folder called "World". Then lastly within your new "Compile" folder create one new additional folder called "Build" and that should be all for now!

Img url: http://s4.postimg.org/6f5lfkje5/structure.png
3.2 Bit
Now we begin the compiling process, start by right clicking your "Compile" folder and select Git Bash, like this.

Img url: http://s29.postimg.org/6bun0d953/Git_Bash.png
after pressing Git Bash a black window should appear and this may look very confusing but I can assure you its not, all you basically need to do is write a single line into the command window

Img url: http://s4.postimg.org/8s9jqudm5/Screenshot_5.png
and hit enter, this step can take a few minutes depending on your internet speed and computer quality how ever when ever the download finishes I suggest you to take a coffee, you deserve it!
How it looks completed :

Img url: http://s17.postimg.org/ao262zabz/Git_Display.png
Welcome back, liar that never took a coffee break. I have glad news for you, the Git step is now completed and if you open your "Compile" folder you can see that there is a new created folder there called "Source", do not rename it or delete/edit any of the existing files within that folder. This is the Source of your server, also you can now close Git Bash. Also notice that [Step 2.3 : Optional Eluna Engine] is as it says optional, it is not required in anyway to have in order to run your server, but however its required to have in order to use Lua scripts in TrinityCore!
3.3 : Optional Eluna Engine
So what did we do in the previous step? Oh yeah that's right we used our new tool called "GitExtensions", well we are not yet finished with it if your reading this because that means you want Eluna Engine so lets get to it!
First to make everything easier, close your Git Bash window and reopen it the same way as before, make sure you target your [Source folder] as we did before as well and not any other.(we do this to avoid all issues possible)
Now lets start adding our Eluna Engine!
Start by applying this code
Now you should see this as a result, if not however then I recommend you reopening your Git Bash, if that however does not solve your issue then scroll down to [Step 8.4 : Eluna Issues].
Now lets continue, second we need to apply this code.
How it looks completed :

Img url: http://s24.postimg.org/pnat37w79/Git_Eluna_Pull.png
Not lastly we are going to make sure you have all the updates needed to run Eluna Engine smoothly.

Img url: http://s3.postimg.org/x3gp66owz/Git_Init.png

Img url: http://s18.postimg.org/jdyu7upwp/Git_Update.png
And now your done with including Eluna Engine!
Now, you should do what you normally do when compiling a server, if you do not know how to continue from this stage then its just to keep reading my tutorial if not, thanks it was great interfering with you!
Step 4: CMake
When opening CMake the first thing you'd see is [Browse Source..] and [Browse Build..], this is kinda basic just press the buttons and select the direction to your folders like this,

Img url: http://s4.postimg.org/yigss9ab1/Screenshot_6.png
Now press configure and another window should appear with a few settings options, these are the settings you should have.

Img url: http://s23.postimg.org/h6pcure1n/Screenshot_7.png
Now its just to press Configure and watch how your server is preparing to getting built.
(Note, if errors appear simply scroll down this thread until you find [Step 8.1 : CMake Errors] if not how ever, just continue along this thread in peace.)
When CMake is done configuring this text should be displayed in the box bellow Configure and Generate
Now its time to Generate this data by pressing, you guessed it Generate and this shouldn't take any longer then 20 seconds and is finished by displaying this string and then you can close CMake, it will no longer be used during this tutorial except for error fixes.
Step 5 : Releasing
Now what? Releasing, what could that possibly be? Well its simple and probably enjoying for you to hear that final step of the compiling, we will release the data from built and that will create our server files.
Now lets get to it!
Open your build folder and locate the file called [All_Build] and try to open the file, if you need to select an program then select Microsoft Visual (that we installed earlier) and when the file is finally opened I need you to change the Solution Configurations from Debug to Release, like this.

Now navigate [Solution 'TrinityCore' (17 projects)] but the project number can be different but should be near by 16~19. When you have located it, right click it and press [Build Solution] or the shortcut key [F7]

When you pressed the shortcut or clicked it yourself a huge number of strings should appear in your Error List, this is where you also might notice some errors, but keep calm, if so we will solve them together in this thread!
If how ever the compile was successful you should see this string at the end in your Error list as well, it should like something like this :
Remember it does not matter if it says 1-3 either up-to-date or skipped, it still was a successful compile!
Step 6: Installing and Placement [AGAIN!]
After completing the previous step we can now find a new folder within the build folder called [Release] inside that you will now find four different files
I now need you to open your World folder and move all these files to that new directory, when files are moved you would need to rename the .conf.dist files to just .conf to make them work properly. You does not how ever need to edit them now since I will guide you trough that step later on in this tutorial.
And now as the topic say for this step its time to continue downloading!
The items listed bellow are all needed to have in order to make this server functional
Lucky you I was so nice to gather all except MySQL.bat files myself in a torrent file for you to download [HERE] how awesome isn't that?
Also an awesome bonus on top on it all, its actually virus free x.x // No jokes.

Img url: http://s30.postimg.org/e3rnwx8lt/Scan.png
Scan result url: https://www.metascan-online.com/en/scanresult/file/fa36cd892efb4142b74b944a8286c3b4
But MySQL.bat can be found [HERE]
Now where should you place all these files? Like this!


Img 1 url: http://s16.postimg.org/i5aopfaj9/World_Folder.png
Img 2 url: http://s13.postimg.org/4x3q0kqkn/Server.png
6.1 Authserver.conf
Now its time for editing your [Authsever.conf]
For editing your conf files I could recommend an program called Notepad++ but your good to go with just the regular notepad if you don't wish to download any more programs (understandable if so)
Notepad++ Download
However when you first open up [Authserver.conf] you'd have to scroll down until you see this
This is the realmlist your server will listen to 127.0.0.1 is default and also is localhost, so its just for you to view, if you wish your server to be public I recommend to change that later on and leave it on 127.0.0.1 but do NOT remove the quote signs [" "] they are required to have. Now continue scrolling down and you'd see a title saying MYSQL SETTINGS under that title you should see this,
Now lets do some explaining, 127.0.0.1 is the adress/IP your auth database will listen to (auth database provides your server with account and character information etc, we will set that up later on.).
3306 is what port your using so the database can connect to your Authserver.exe and I suggest you to use the default, do not change that value to anything other then the default.
Root, this is your username to the database so you can access your files and modify/view/update or change them Root is default but can be changed to anything you'd wish to have as your username.
Ascent, this is your password to the database, that you now again need to access the database.
Auth, this is what the table is called that your Authserver.exe will connect. This can be changed to anything but then how ever you'd have to change the table name to that same exact name, recommended to stay on default there as well to avoid issues.
Now were done editing that, simply close and save changes.
6.2 Worldserver.conf
When opening Worldserver.conf you need to start with scrolling down until you see the title [CONNECTIONS AND DIRECTORIES] under that title you should see this
This don't need any further explaining if you remember anything from the last config file (Authserver.conf) since it is the same instructions that would be given.
How ever its very important that you use the same IP, PORT, Username, Password as before!
But I can recommend to save the database table names as they are
Now you'd need to keep scrolling down a little bit and you should see another BindIP as we saw in the Authserver.conf, also note here that you need to have the same IP entered here as before in order to avoid errors and shutdowns. Thought above BindIP you should see WorldServerPort=8085 do not change that no matter what your port are if your not more experienced in this section.
and that should be all in Worldserver.conf, simply close and save changes.
Step 7: Database
7.1 DB Connect and Structure
Now its time to create your database, the final step in your server compile!
First you'd have to open/start your MySQL.bat since that is your servers source now. There is where all the data will be stored from your server, so this is a must at every time for connecting to your database. Now open your Database Editor you downloaded earlier (HeidiSQL, Navicat or SqlYog) and enter your chosen information, for me it looks like this in HeidiSQL.
/*NOTE remember that your port should probably be set to 3306 since that is the default and NOT 3307 as I have changed mine to*/

Img url: http://s29.postimg.org/zbpwvkd53/My_SQL.png
Now when your finally logged into your database you need to start by creating 3 new databases called
Like this, (instructed with HeidiSQL).

Img url: http://s16.postimg.org/xdpb8zqqd/Databases.png

Img url: http://s22.postimg.org/pi493rzyp/Create_Database.png
Recommended to use Collation : [utf8_general_ci], you can also use execute this sql code to automatically create the tables,
However continue doing this until you have created all 3 databases.
Now when that's done you'd need to open your Source folder and then locate a folder called SQL, then lastly open base and there you'd fine something looking like this.

Img url: http://s11.postimg.org/9v4pw4dur/Files.png
Next, drag auth_database.sql into your HeidiSQL window and then select auth database you just created and press either the button [Execute SQL] or [F9] as shortcut and when the SQL has been fully executed you'd need to refresh the database your working with by either pressing [Refresh] (or by hitting F5 - shortcut in HeidiSQL). Now do the same for Characters_database.sql.
You may receive warnings or errors here but ignore them, it should still be functional!

Img url: http://s11.postimg.org/upzfwx1r7/Auth_Structure.png
7.2 World Database
Now, lastly we the only remaining database to fill, world!
This one is a bit bigger and requires a bit more work to finish, first of you'd have to download the SQL files [HERE].

Img url: http://s29.postimg.org/3tsp4rvrb/World_SQLFiles.png
Or you can download the same file with GitExtensions, if you wish to do that then simply select an folder, what folder does not matter. Then press Git Bash as we did earlier in this tutorial and use this code:
Now, whenever your download is completed you'd need to reopen HeidiSQL or what tool your using yourself of if you of course have closed it, otherwise surprisingly you don't need to close it and reopen it. Now select your World database and now open up your newly downloaded EDB/EDB-Master and go into the folder called [Tools] There you'd see an bat file called Merge_Importer.bat, open that up and follow do as I do in the images bellow.

Img url: http://s11.postimg.org/8tvxl1d0j/Merge_Display.png

Img url: http://s30.postimg.org/hvn72ifvl/Merge_Processing.png
7.3 World Data Filling
Now press 1 as I did and then hit enter and it will start to load, this should not take very long time at all and wait for it to finish,

Img url: http://s27.postimg.org/gmea0khyr/Merge_Complete.png
Then simply close the window or press any random key. Now you'd have a new file in your [Tools] folder called ED_WORLD.sql now in your Database program (HeidiSQL for me) press File and then look for Load SQL File (I can not use images here since my HeidiSQL is in swedish and I think most of you would not understand the language)
Now locate your ED_WORLD.sql file and press open and then a window should appear saying this,

Img url: http://s16.postimg.org/4hixp63hh/Run_File_S.png
Now make sure a 2th time you have selected your database [World] by left clicking on it once then
Press Run file(s) directly, then wait. This might take a longer time so get yourself another cup of coffee or a sandwich.
6.4 World Updates
After finishing our last step in our world database we now need to update the information that we just entered into World, to do that first you'd need to refresh the information we just inserted into your database, to do so just select your World database and press Refresh (if your using HeidiSQL press F5). Now when that's done we go back into your EDB folder and then go into an folder called [Updates] there you'd see a date in a .sql file, the date is how new the update are. The newer the better, so mine will possibly be different then yours, however, now you'd need to select your World database if you haven't already and insert that specific .sql file, you can do this by either dragging it into your Database program (HeidiSQL, Navicat, SqlYog) or pressing [Load SQL File] as we did before. Then run your update by either pressing [Execute SQL] or hitting [F9 - shortcut in HeidiSQL].
Then your done, you now have a functional server congrats!!!
But I do highly recommend reading [step : 8.2 Database Errors] even if you do not receive any errors just to make sure you have all the recent database updates available for you, but its not needed how so ever if your server is running smoothly.
Step 8 : Bonus
This step will probably be ignored by the most people because in this step I will just demonstrate how to create your account, change your server name and change realmlist for your server.
8.1 Server Name and Realmlist
For editing your Realmlist and Server Name you'd need to lunch MySQL and the open up your database development program (HeidiSQL, Navicat or SqlYog) then open your database [Auth]. After that you'd have to scroll down until you see a table called [Realmlist] left click that table and press data and a bunch of stuff should appear looking like this.

Img url: http://s3.postimg.org/e7y8hb8ub/Data_Realmlist.png
Now what does all this mean?
Anything further then that should not be edited! Then your are done!
8.2 Account Creation
Lets create an account shall we?! You might think this could be done in the database but no, it cannot because of Sha_pass_hash (password encrypted) an regular password cannot be entered. So we have to do it in our Worldserver.exe start by opening MySQL, when that is fully loaded continue by opening Authserver.exe, same there when that's fully loaded lastly open up Worldsever.exe and after Worldserver.exe has completed loading you'd have to write this into it.
Remember that Username and Password can be changed to whatever you wish, now your done!
But hey since its your server why shouldn't you have a GM rank? Lets add it!
Now what does all that mean?
Well account set gmlevel is kinda basic and does not need any further explanations according to me, how ever Username is of course the Username of the account you want to give a GM Rank, in this scenario its yours. But what about 3? 3 Is the rank your giving your account there are 4 different ranks, let me explain them to you.
You can use any rank you'd like but NOT 4 for security reasons, you should never use this rank because then someone even if its you would have higher Security Level then your console (Worldserver.exe) and that can be demolishing for you and your server.
Lastly what does -1 mean? the last number in that line is then -1 and that is what RealmId you would have that Gm Rank on. Your RealmId is 1 but if you enter -1 you'd have your Gm Rank available on any Realm you change to, so if you create another Realm in the future you'd have that rank there as well.
But if you would like to give someone Gm Rank on only one specific server then go into Auth in your database then further to Realmlist then check the realms Id and that's the number you'd use to give them access to that specific Realm.
Step 9: Error Fixes
So your experiencing issues? That's not good. Lets try to solve them!
Instructions: I will only solve CMake, Database errors and Connection issues, if you experience any other kind of error please feel free to make a thread [HERE] and let it into the hands of Emudevs members!
9.1 CMake Errors
CMake Error One
This Error is displayed because of your settings here are wrong,
Img url: http://s23.postimg.org/h6pcure1n/Screenshot_7.png
Make sure you have selected the right generator, in this case Visual Studio 12 2013 or if you downloaded another version. Then also make sure that you have selected [Use default native compiers] and nother more then that. After doing this you should be good to go!
CMake Error Two
If this error occurs CMake couldn't find your MySQL libraries that we installed and downloaded, but don't worry we can solve this without re-installing anything!
First of you'd need to select Advanced here,

Img url: http://s15.postimg.org/omx13umm3/Advanced.png
then scroll down until you see this,

Img url: http://s16.postimg.org/wvblnllt1/No_Path_Fix1.png
Then press the 3 dots and find your MySQL Include Directory

Img url: http://s27.postimg.org/3t4mdler7/No_Path_Fix2.png
Now it should no longer say that the path isn't found anymore, but however the one bellow might say its missing. To fix that you'd have to do the same process until you reach what folder to select so instead of selecting Includes we now select this single file.
You simply go to your MySQL-5.6.XX and then go either open Win32 or Win64 depening on your System Type and then select the file [libmysql.lib], the file showed bellow and hit Ok and press configure again.

Img url: http://s28.postimg.org/qiahut9wt/No_Path_Fix3.png
CMake Error Three
To solve this error we once again need to check Advanced as we did in CMake Error Two, if you do not know how to do this, please scroll up and look at the image displayed. Then scroll down and you should see this,

Img url: http://s10.postimg.org/lv6i2q709/No_Path_Fix4.png
To solve this we once again need to find the path to Git.exe, NOT GitExtensions.exe, so press the red column anywhere really and then press the 3 dotted button at the very right and find your Git Folder directory, mine is at
When ever you found your folder enter it and then you'd see several files and folder, now don't be in a hurry. Find a folder called [cmd] and inside that you should find a file called [Git.exe] select taht and press Open, now lets try configure again.
9.2 Database Errors
Do you see a lot of errors in your Worldserver.exe when lunching? Well that means your database isn't fully updated, lets try to add some more updates, shall we.
Go into your Source folder that we made earlier and browse to a folder called SQL now make a new folder in that directory called anything you'd like, I named mine [MergeAllWorldUpdates],

Img url: http://s13.postimg.org/5kf7v2o47/Merge_All_World_Updates.png
Now in that folder make a Text Document file or if you have Notepad++ open that.
Now paste this into it (Special Thanks to EDB for making the original Merge_Importer!)
Now when the code is entered if your using notepad++ you'd need to do this before saving the file as Batch by selecting Language and Batch, like this.

Img url: http://s2.postimg.org/ho8myoq0p/Save_As_Notepad.png
Then press CTRL+S to save the file or save it manually
If you are using a Text Document then you'd have to press Save As and then write a name, Name it something you'd remember since you might use it more then once in the future, I named mine [Merger_Importer v2] but you'd have to write .bat after the name as well then hit save. Then you will have a text document file and a .bat file, you can delete the text document file if you'd like. Its not needed BUT if you like to edit it yourself I can recommend saving it, however lets move on.
Now open up the bat file we just created and press 1 when it's done loading then hit enter and now you should have 2 new files in your newly created folder one called WORLD_UPDATES.SQL and one called AUTH_UPDATES.SQL now insert them as you did earlier when creating your database, if you do not remember I suggest you to scroll back up and take a look at [Step 6 : Database]!
9.3 Connection Errors
Instructions: In this section I will only focus on Realmlists and Ports!
MySQL.bat Crashing
Now to solve this error we need to first make sure that if you have programs like example [XAMP] installed that your MySQL there is not running because a MySQL.bat crash can be caused by PORT problems. Lets say your using two MySQL.bat of the same kind and settings. The first one will connect to the port that its coded to connect to (default : 3306) and it will load successfully. Now when you open it the second time the second MySQL will crash because its also trying to connect to the same port but its taken so it means it failed to connect to that specific port and that results in a crash.
Now you can solve this in three ways, first and easiest if possible.
Solution 1
If you have any programs that hosts a database, close its MySQL or change their port settings to etc 3306 and your MySQL.bat should run fine.
Solution 2
What is your folder called that your MySQL.bat is located in? Is it anything other then [_Server]? well then that's the issue. the Folder name is required to stay at _Server by its settings. So I highly suggest you to re-change that into its original name. But if you really wish to change the folder name you can follow the Jordy Thery's instructions on how to do so, (Jordy Thery is the creator of this MySQL.bat) in the README.txt file, if you can't fine the file press [HERE] to download it or [HERE] to view it online.
Solution 3
Change the MySQL.bat's PORT settings and how to edit this MySQL.bat's settings is still found in the readme.txt of you can't find it then once again press [HERE] to download it or [HERE] to view it online. Now simply change all the 3306 to another port, suggested 3306.
None of the issues or solutions worked for you? Well then the last advice I can give you is to first open both Worldserver.conf and Authserver.conf and check your Realmlist,
Authserver.conf
Worldserver.conf
Find all these and make sure it all have the same values (127.0.0.1).
If it does have all the same values then try looking at your WoW's realmlist settings found in your World of Warcraft directory, then into Data and here we reach a cross road, try entering enGB if and see if you find any file called Reamlist.wtf if not then check in the folder enUS.
Your Realmlist should look like this,
but if you want to save an additional realmlist (not delete the old you using) you can do this
The # will allow you to store the other realmlist in you realmlist.wtf without trying to log into it.
8.4 Eluna Errors
So you encountered some issues during the Eluna phase huh? Well in this section I will only provide the answer to one error which would be your [git status] result.
So this is what the result should look like :
Now, to solve this you can start by shutting down your Git Bash window completely then relaunch it the same way as we did in [Step 2.3 : Optinal Eluna Engine] and try the same command again, [git status]. If this solves your issue then continue on with the tutorial as it keeps going from where you experienced issues. However if it does not solve your issue and the result is something like this.
Then you'd have to stop the merging since you are no longer doing any merging since we waited the process out, but if you however wanted to speed trough the tutorial I suggest you to slow down and let it take the time that it does. But if you have waited and you know there is nothing that your currently merging, pulling or cloning then you could use this command to stop the event
What [git merge --abort] does is that it aborts all current merging that are running in Git Bash so after that I would check for changes with [git status] and if non have occurred then relaunch Git Bash one again.
Thanks for following my tutorial, Best Regards, Unknown96!
SqlYog
SqlYog is a Database Development Tool I actually never have tried myself so I do not know really anything about the program itself, but it is one of the 3 recommended Development Tools by EmuDevs/TrinityCore them self and you can by pressing SqlYog above and select the system type your running.
Img url : http://www.zwodnik.com/media/images/sqlyog_windows.png
Navicat For SQL Server
This tool is well known around the web for it great functionality and productiveness even thought its a bit more advanced Database Developer Tool its worth trying for the more experienced people, Navicat also has a smooth layout with and great program tools!
Img ulr: http://i1-win.softpedia-static.com/screenshots/Navicat-Essentials-for-MySQL_1.png
1.6 Boost
About
Boost is a prebuilt Windows Binary matching your platform that allows your computer to handle the information without running into any unknown territory basically, that's why this binary is included to your computer.
Download and Placement
You can either download the [32bit] or the [64bit] it all depends on your computer, also I really recommend placing this folder some where local such as [Example. C:\YourComputerName] because of its easy access and localization.
Installation
First you'd need to have the file downloaded and placed at the suggested location, then enter your Control Panel and press System and Security and after that press Advanced System Settings (This requires administrator user to access!) When you have accessed the next window you should press [Environment Variables...] > New User Variable then fill in the information shown in the image bellow and press [OK]
Img url: http://collab.kpsn.org/download/att...rsion=1&modificationDate=1406047952000&api=v2
1.7 CMake
About
CMake is one of the main programs used in compiling a server, its used for converting the information/data that we gather with GitExtensions and converte it to a more buildable/compilable data, this is one of the places errors most likely occurs.
Download and Placement
You can download the file [HERE], just scroll down until you see [cmake-3.2.X-win32-x86.exe] and download the file, there is not suggested placement of this program since we won't be needing to go to the program folder itself, we will stick to the program only.
1.8 MySQL Development Files
About
Wait whaat?! Didn't we download MySQL already? Yes we indeed did, this how ever is just includes to MySQL Server Community Edition that we need in order not succeed the compile itself, its a very small file that only contains 3 folders.
Download And Placement
You can download the file [HERE], and you should after that place the folders downloaded into your MySQL Server Community Edition folder, merge the includes folder if there already is one and just place out the lib_64 and lib_32 folders inside the MySQL folder. Note that you need to add both to avoid errors no matter what your System Type is.
[EXAMPLE]
Img url: http://s17.postimg.org/rri1aqg2n/Screenshot_1.png
1.9 OpenSSL
About
Finally our last program on the list! I know you feel the joy, we are closing in our goal after all that installing you might want a break or at least your computer wants one. How ever OpenSSL is another and almost the last binary/library folder container that we will download, but it indeed is the last one we will download in order to complete the compile.
Download And Placement
You can get your final download [THERE] since there [HERE] button was broken, unfortunately. How ever we always got a [THERE] button to spare! And for placing OpenSSL I would recommend you to place it some where you could remember its location easly since we will possibly return into this folder to prevent errors or fix errors in the future.
Step 3 : Forge
So you just downloaded Forge huh? Well then lets take the quick and easy step forward with this application.
The first question you'd need to ask yourself is, do you already have any of the programs required to compile a TrinityCore server? If you'r unsure please look at the eight requirements again.
Okey so lets get going with this. When you first open up Forge.exe you should type this line in that is writen bellow, if you do not have any of the eight required programs installed as I am assuming. If you do you can hand pick out the files you want to either download or install with the commands that I mentioned above. Lets continue.
Code:
Download.All [Architecture] [Version - Optional]Remember that Architecture stands for system type and you have x86 and x64 to choose between. x86 being 32 bit and x64 being 64 bit.
When everything is done downloading enter this into your Forge.exe
Code:
Install.All [Architecture] [Password]And once again Architecture is your system type as before. And the password is for your MySQL so enter whatever password you wish to have.
//NOTE//
Currently there is a defect in forge where it doesn't work correctly with the password set however the download is highly successful. The only effect this have is that your password will not be set after the download is complete and an error message during the download about MySQL however you can just ignore that for now. It might even be fixed by the time your reading this.
Step 3 : Git and Preparations
3.1 Preparations
Finally we have arrived to the part where the compiling process will begin but before we start compiling we should need a few folders to place our server in and I can highly recommend placing the server either on your hard drive (C:/) or on your desktop.
Start by making a new folder called TrinityCore or anything else really, second of I want you to enter your new created folder and create a new folder called "Compile" and a folder called "World". Then lastly within your new "Compile" folder create one new additional folder called "Build" and that should be all for now!
Img url: http://s4.postimg.org/6f5lfkje5/structure.png
3.2 Bit
Now we begin the compiling process, start by right clicking your "Compile" folder and select Git Bash, like this.
Img url: http://s29.postimg.org/6bun0d953/Git_Bash.png
after pressing Git Bash a black window should appear and this may look very confusing but I can assure you its not, all you basically need to do is write a single line into the command window
Code:
git clone -b 3.3.5 git://Github.com/TrinityCore/TrinityCore.git SourceImg url: http://s4.postimg.org/8s9jqudm5/Screenshot_5.png
and hit enter, this step can take a few minutes depending on your internet speed and computer quality how ever when ever the download finishes I suggest you to take a coffee, you deserve it!
How it looks completed :
Img url: http://s17.postimg.org/ao262zabz/Git_Display.png
Welcome back, liar that never took a coffee break. I have glad news for you, the Git step is now completed and if you open your "Compile" folder you can see that there is a new created folder there called "Source", do not rename it or delete/edit any of the existing files within that folder. This is the Source of your server, also you can now close Git Bash. Also notice that [Step 2.3 : Optional Eluna Engine] is as it says optional, it is not required in anyway to have in order to run your server, but however its required to have in order to use Lua scripts in TrinityCore!
3.3 : Optional Eluna Engine
So what did we do in the previous step? Oh yeah that's right we used our new tool called "GitExtensions", well we are not yet finished with it if your reading this because that means you want Eluna Engine so lets get to it!
First to make everything easier, close your Git Bash window and reopen it the same way as before, make sure you target your [Source folder] as we did before as well and not any other.(we do this to avoid all issues possible)
Now lets start adding our Eluna Engine!
Start by applying this code
Code:
git statusNow you should see this as a result, if not however then I recommend you reopening your Git Bash, if that however does not solve your issue then scroll down to [Step 8.4 : Eluna Issues].
Code:
# On branch 3.3.5
nothing to commit, working directory clean
Now lets continue, second we need to apply this code.
Code:
git pull --recurse-submodules https://github.com/ElunaLuaEngine/ElunaTrinityWotlk.gitHow it looks completed :
Img url: http://s24.postimg.org/pnat37w79/Git_Eluna_Pull.png
Not lastly we are going to make sure you have all the updates needed to run Eluna Engine smoothly.
Code:
1. git submodule init
2. git submodule update
Img url: http://s3.postimg.org/x3gp66owz/Git_Init.png
Img url: http://s18.postimg.org/jdyu7upwp/Git_Update.png
And now your done with including Eluna Engine!
Now, you should do what you normally do when compiling a server, if you do not know how to continue from this stage then its just to keep reading my tutorial if not, thanks it was great interfering with you!
Step 4: CMake
When opening CMake the first thing you'd see is [Browse Source..] and [Browse Build..], this is kinda basic just press the buttons and select the direction to your folders like this,
Img url: http://s4.postimg.org/yigss9ab1/Screenshot_6.png
Now press configure and another window should appear with a few settings options, these are the settings you should have.
Img url: http://s23.postimg.org/h6pcure1n/Screenshot_7.png
Now its just to press Configure and watch how your server is preparing to getting built.
(Note, if errors appear simply scroll down this thread until you find [Step 8.1 : CMake Errors] if not how ever, just continue along this thread in peace.)
When CMake is done configuring this text should be displayed in the box bellow Configure and Generate
Code:
* TrinityCore revision   : 0465327e38ab+ 2015-03-16 18:43:31 +0100 (3.3.5 branch)

* Install core to        : C:/Program Files/TrinityCore

* Build world/auth       : Yes (default)
* Build with scripts     : Yes (default)
* Build Eluna LuaEngine   : Yes (default)
* Build map/vmap tools   : No  (default)
* Build core w/PCH       : Yes (default)
* Build scripts w/PCH    : Yes (default)
* Show compile-warnings  : No  (default)
* Use coreside debug     : No  (default)
* Use GIT revision hash  : Yes

SCRIPT PREPARATIONS
  -> Prepared: Spells
  -> Prepared: Commands
  -> Prepared: Custom
  -> Prepared: World
  -> Prepared: Outdoor PVP Zones
  -> Prepared: Eastern Kingdoms
  -> Prepared: Kalimdor
  -> Prepared: Outland
  -> Prepared: Northrend
  -> Prepared: Events
  -> Prepared: Pet
SCRIPT PREPARATION COMPLETE

Boost version: 1.57.0
Found the following Boost libraries:
  system
  filesystem
Configuring done
Now its time to Generate this data by pressing, you guessed it Generate and this shouldn't take any longer then 20 seconds and is finished by displaying this string and then you can close CMake, it will no longer be used during this tutorial except for error fixes.
Code:
Generating doneStep 5 : Releasing
Now what? Releasing, what could that possibly be? Well its simple and probably enjoying for you to hear that final step of the compiling, we will release the data from built and that will create our server files.
Now lets get to it!
Open your build folder and locate the file called [All_Build] and try to open the file, if you need to select an program then select Microsoft Visual (that we installed earlier) and when the file is finally opened I need you to change the Solution Configurations from Debug to Release, like this.
Now navigate [Solution 'TrinityCore' (17 projects)] but the project number can be different but should be near by 16~19. When you have located it, right click it and press [Build Solution] or the shortcut key [F7]
When you pressed the shortcut or clicked it yourself a huge number of strings should appear in your Error List, this is where you also might notice some errors, but keep calm, if so we will solve them together in this thread!
If how ever the compile was successful you should see this string at the end in your Error list as well, it should like something like this :
Code:
========== Build: 16 succeeded, 0 failed, 0 up-to-date, 1 skipped ==========Remember it does not matter if it says 1-3 either up-to-date or skipped, it still was a successful compile!
Step 6: Installing and Placement [AGAIN!]
After completing the previous step we can now find a new folder within the build folder called [Release] inside that you will now find four different files
Code:
Authserver.exe
Worldserver.exe
Authserver.conf.dist
Worldsever.conf.dist
I now need you to open your World folder and move all these files to that new directory, when files are moved you would need to rename the .conf.dist files to just .conf to make them work properly. You does not how ever need to edit them now since I will guide you trough that step later on in this tutorial.
And now as the topic say for this step its time to continue downloading!
The items listed bellow are all needed to have in order to make this server functional
Code:
maps
vmaps
mmaps
dbc
dll files
MySQL.bat
Lucky you I was so nice to gather all except MySQL.bat files myself in a torrent file for you to download [HERE] how awesome isn't that?
Also an awesome bonus on top on it all, its actually virus free x.x // No jokes.
Img url: http://s30.postimg.org/e3rnwx8lt/Scan.png
Scan result url: https://www.metascan-online.com/en/scanresult/file/fa36cd892efb4142b74b944a8286c3b4
But MySQL.bat can be found [HERE]
Now where should you place all these files? Like this!
Img 1 url: http://s16.postimg.org/i5aopfaj9/World_Folder.png
Img 2 url: http://s13.postimg.org/4x3q0kqkn/Server.png
6.1 Authserver.conf
Now its time for editing your [Authsever.conf]
For editing your conf files I could recommend an program called Notepad++ but your good to go with just the regular notepad if you don't wish to download any more programs (understandable if so)
Notepad++ Download
However when you first open up [Authserver.conf] you'd have to scroll down until you see this
Code:
BindIP = "127.0.0.1"This is the realmlist your server will listen to 127.0.0.1 is default and also is localhost, so its just for you to view, if you wish your server to be public I recommend to change that later on and leave it on 127.0.0.1 but do NOT remove the quote signs [" "] they are required to have. Now continue scrolling down and you'd see a title saying MYSQL SETTINGS under that title you should see this,
Code:
LoginDatabaseInfo = "127.0.0.1;3306;root;ascent;auth"Now lets do some explaining, 127.0.0.1 is the adress/IP your auth database will listen to (auth database provides your server with account and character information etc, we will set that up later on.).
3306 is what port your using so the database can connect to your Authserver.exe and I suggest you to use the default, do not change that value to anything other then the default.
Root, this is your username to the database so you can access your files and modify/view/update or change them Root is default but can be changed to anything you'd wish to have as your username.
Ascent, this is your password to the database, that you now again need to access the database.
Auth, this is what the table is called that your Authserver.exe will connect. This can be changed to anything but then how ever you'd have to change the table name to that same exact name, recommended to stay on default there as well to avoid issues.
Now were done editing that, simply close and save changes.
6.2 Worldserver.conf
When opening Worldserver.conf you need to start with scrolling down until you see the title [CONNECTIONS AND DIRECTORIES] under that title you should see this
Code:
LoginDatabaseInfo     = "127.0.0.1;3306;root;ascent;auth"
WorldDatabaseInfo     = "127.0.0.1;3306;root;ascent;world"
CharacterDatabaseInfo = "127.0.0.1;3306;root;ascent;characters"
This don't need any further explaining if you remember anything from the last config file (Authserver.conf) since it is the same instructions that would be given.
How ever its very important that you use the same IP, PORT, Username, Password as before!
But I can recommend to save the database table names as they are
Code:
LoginDatabaseInfo     = "127.0.0.1;3306;root;ascent;[COLOR="#00FF00"][COLOR="#00FF00"]auth[/COLOR][/COLOR]"
WorldDatabaseInfo     = "127.0.0.1;3306;root;ascent;[COLOR="#00FF00"]world[/COLOR]"
CharacterDatabaseInfo = "127.0.0.1;3306;root;ascent;[COLOR="#00FF00"]characters[/COLOR]"
Now you'd need to keep scrolling down a little bit and you should see another BindIP as we saw in the Authserver.conf, also note here that you need to have the same IP entered here as before in order to avoid errors and shutdowns. Thought above BindIP you should see WorldServerPort=8085 do not change that no matter what your port are if your not more experienced in this section.
Code:
BindIP = "127.0.0.1"and that should be all in Worldserver.conf, simply close and save changes.
Step 7: Database
7.1 DB Connect and Structure
Now its time to create your database, the final step in your server compile!
First you'd have to open/start your MySQL.bat since that is your servers source now. There is where all the data will be stored from your server, so this is a must at every time for connecting to your database. Now open your Database Editor you downloaded earlier (HeidiSQL, Navicat or SqlYog) and enter your chosen information, for me it looks like this in HeidiSQL.
/*NOTE remember that your port should probably be set to 3306 since that is the default and NOT 3307 as I have changed mine to*/
Img url: http://s29.postimg.org/zbpwvkd53/My_SQL.png
Now when your finally logged into your database you need to start by creating 3 new databases called
Code:
Auth
Characters
World
Like this, (instructed with HeidiSQL).
Img url: http://s16.postimg.org/xdpb8zqqd/Databases.png
Img url: http://s22.postimg.org/pi493rzyp/Create_Database.png
Recommended to use Collation : [utf8_general_ci], you can also use execute this sql code to automatically create the tables,
Code:
[COLOR="#00FF00"]GRANT USAGE ON * . * TO 'trinity'@'localhost' IDENTIFIED BY 'trinity' WITH MAX_QUERIES_PER_HOUR 0 MAX_CONNECTIONS_PER_HOUR 0 MAX_UPDATES_PER_HOUR 0 ;
CREATE DATABASE `world` DEFAULT CHARACTER SET utf8 COLLATE utf8_general_ci;
CREATE DATABASE `characters` DEFAULT CHARACTER SET utf8 COLLATE utf8_general_ci;
CREATE DATABASE `auth` DEFAULT CHARACTER SET utf8 COLLATE utf8_general_ci;
GRANT ALL PRIVILEGES ON `world` . * TO 'trinity'@'localhost' WITH GRANT OPTION;
GRANT ALL PRIVILEGES ON `characters` . * TO 'trinity'@'localhost' WITH GRANT OPTION;
GRANT ALL PRIVILEGES ON `auth` . * TO 'trinity'@'localhost' WITH GRANT OPTION;[/COLOR]
However continue doing this until you have created all 3 databases.
Now when that's done you'd need to open your Source folder and then locate a folder called SQL, then lastly open base and there you'd fine something looking like this.
Img url: http://s11.postimg.org/9v4pw4dur/Files.png
Next, drag auth_database.sql into your HeidiSQL window and then select auth database you just created and press either the button [Execute SQL] or [F9] as shortcut and when the SQL has been fully executed you'd need to refresh the database your working with by either pressing [Refresh] (or by hitting F5 - shortcut in HeidiSQL). Now do the same for Characters_database.sql.
You may receive warnings or errors here but ignore them, it should still be functional!
Img url: http://s11.postimg.org/upzfwx1r7/Auth_Structure.png
7.2 World Database
Now, lastly we the only remaining database to fill, world!
This one is a bit bigger and requires a bit more work to finish, first of you'd have to download the SQL files [HERE].
Img url: http://s29.postimg.org/3tsp4rvrb/World_SQLFiles.png
Or you can download the same file with GitExtensions, if you wish to do that then simply select an folder, what folder does not matter. Then press Git Bash as we did earlier in this tutorial and use this code:
Code:
git clone https://github.com/EmuDevs/EDB.gitNow, whenever your download is completed you'd need to reopen HeidiSQL or what tool your using yourself of if you of course have closed it, otherwise surprisingly you don't need to close it and reopen it. Now select your World database and now open up your newly downloaded EDB/EDB-Master and go into the folder called [Tools] There you'd see an bat file called Merge_Importer.bat, open that up and follow do as I do in the images bellow.
Img url: http://s11.postimg.org/8tvxl1d0j/Merge_Display.png
Img url: http://s30.postimg.org/hvn72ifvl/Merge_Processing.png
7.3 World Data Filling
Now press 1 as I did and then hit enter and it will start to load, this should not take very long time at all and wait for it to finish,
Img url: http://s27.postimg.org/gmea0khyr/Merge_Complete.png
Then simply close the window or press any random key. Now you'd have a new file in your [Tools] folder called ED_WORLD.sql now in your Database program (HeidiSQL for me) press File and then look for Load SQL File (I can not use images here since my HeidiSQL is in swedish and I think most of you would not understand the language)
Now locate your ED_WORLD.sql file and press open and then a window should appear saying this,
Img url: http://s16.postimg.org/4hixp63hh/Run_File_S.png
Now make sure a 2th time you have selected your database [World] by left clicking on it once then
Press Run file(s) directly, then wait. This might take a longer time so get yourself another cup of coffee or a sandwich.
6.4 World Updates
After finishing our last step in our world database we now need to update the information that we just entered into World, to do that first you'd need to refresh the information we just inserted into your database, to do so just select your World database and press Refresh (if your using HeidiSQL press F5). Now when that's done we go back into your EDB folder and then go into an folder called [Updates] there you'd see a date in a .sql file, the date is how new the update are. The newer the better, so mine will possibly be different then yours, however, now you'd need to select your World database if you haven't already and insert that specific .sql file, you can do this by either dragging it into your Database program (HeidiSQL, Navicat, SqlYog) or pressing [Load SQL File] as we did before. Then run your update by either pressing [Execute SQL] or hitting [F9 - shortcut in HeidiSQL].
Then your done, you now have a functional server congrats!!!
But I do highly recommend reading [step : 8.2 Database Errors] even if you do not receive any errors just to make sure you have all the recent database updates available for you, but its not needed how so ever if your server is running smoothly.
Step 8 : Bonus
This step will probably be ignored by the most people because in this step I will just demonstrate how to create your account, change your server name and change realmlist for your server.
8.1 Server Name and Realmlist
For editing your Realmlist and Server Name you'd need to lunch MySQL and the open up your database development program (HeidiSQL, Navicat or SqlYog) then open your database [Auth]. After that you'd have to scroll down until you see a table called [Realmlist] left click that table and press data and a bunch of stuff should appear looking like this.
Img url: http://s3.postimg.org/e7y8hb8ub/Data_Realmlist.png
Now what does all this mean?
Code:
Id = RealmlistId // Does not required to be changed.
Name = Your Server Name // Edit this to anything you'd like!
Adress = Your Server Realmlist // Change this to default or what ever you entered into your config files (default : 127.0.0.1)
LocalAdress = Not to sure (If anyone knows please comment bellow!)
Anything further then that should not be edited! Then your are done!
8.2 Account Creation
Lets create an account shall we?! You might think this could be done in the database but no, it cannot because of Sha_pass_hash (password encrypted) an regular password cannot be entered. So we have to do it in our Worldserver.exe start by opening MySQL, when that is fully loaded continue by opening Authserver.exe, same there when that's fully loaded lastly open up Worldsever.exe and after Worldserver.exe has completed loading you'd have to write this into it.
Code:
account create Username Password

Example
Account create Admin Admin
Remember that Username and Password can be changed to whatever you wish, now your done!
But hey since its your server why shouldn't you have a GM rank? Lets add it!
Code:
account set gmlevel Username 3 -1Now what does all that mean?
Well account set gmlevel is kinda basic and does not need any further explanations according to me, how ever Username is of course the Username of the account you want to give a GM Rank, in this scenario its yours. But what about 3? 3 Is the rank your giving your account there are 4 different ranks, let me explain them to you.
Code:
0            - Default Rank (Player)
1            - Moderator
2            - Game Master
3            - Admin
4            - Console
You can use any rank you'd like but NOT 4 for security reasons, you should never use this rank because then someone even if its you would have higher Security Level then your console (Worldserver.exe) and that can be demolishing for you and your server.
Lastly what does -1 mean? the last number in that line is then -1 and that is what RealmId you would have that Gm Rank on. Your RealmId is 1 but if you enter -1 you'd have your Gm Rank available on any Realm you change to, so if you create another Realm in the future you'd have that rank there as well.
But if you would like to give someone Gm Rank on only one specific server then go into Auth in your database then further to Realmlist then check the realms Id and that's the number you'd use to give them access to that specific Realm.
Step 9: Error Fixes
So your experiencing issues? That's not good. Lets try to solve them!
Instructions: I will only solve CMake, Database errors and Connection issues, if you experience any other kind of error please feel free to make a thread [HERE] and let it into the hands of Emudevs members!
9.1 CMake Errors
CMake Error One
Code:
CMake Error at CMakeLists.txt:12 (project):
  No CMAKE_C_COMPILER could be found.

CMake Error at CMakeLists.txt:12 (project):
  No CMAKE_CXX_COMPILER could be found.
This Error is displayed because of your settings here are wrong,
Img url: http://s23.postimg.org/h6pcure1n/Screenshot_7.png
Make sure you have selected the right generator, in this case Visual Studio 12 2013 or if you downloaded another version. Then also make sure that you have selected [Use default native compiers] and nother more then that. After doing this you should be good to go!
CMake Error Two
Code:
Found the following Boost libraries:
  system
  thread
  program_options
CMake Error at cmake/macros/FindMySQL.cmake:195 (message):
  Could not find the MySQL libraries! Please install the development
  libraries and headers
Call Stack (most recent call first):
  CMakeLists.txt:61 (find_package)
If this error occurs CMake couldn't find your MySQL libraries that we installed and downloaded, but don't worry we can solve this without re-installing anything!
First of you'd need to select Advanced here,
Img url: http://s15.postimg.org/omx13umm3/Advanced.png
then scroll down until you see this,
Img url: http://s16.postimg.org/wvblnllt1/No_Path_Fix1.png
Then press the 3 dots and find your MySQL Include Directory
Img url: http://s27.postimg.org/3t4mdler7/No_Path_Fix2.png
Now it should no longer say that the path isn't found anymore, but however the one bellow might say its missing. To fix that you'd have to do the same process until you reach what folder to select so instead of selecting Includes we now select this single file.
You simply go to your MySQL-5.6.XX and then go either open Win32 or Win64 depening on your System Type and then select the file [libmysql.lib], the file showed bellow and hit Ok and press configure again.
Img url: http://s28.postimg.org/qiahut9wt/No_Path_Fix3.png
CMake Error Three
Code:
CMake Error at cmake/macros/FindGit.cmake:24 (message):


      Git was NOT FOUND on your system - did you forget to install a recent version, or setting the path to it?
      Observe that for revision hash/date to work you need at least version 1.7
Call Stack (most recent call first):
  CMakeLists.txt:70 (find_package)
To solve this error we once again need to check Advanced as we did in CMake Error Two, if you do not know how to do this, please scroll up and look at the image displayed. Then scroll down and you should see this,
Img url: http://s10.postimg.org/lv6i2q709/No_Path_Fix4.png
To solve this we once again need to find the path to Git.exe, NOT GitExtensions.exe, so press the red column anywhere really and then press the 3 dotted button at the very right and find your Git Folder directory, mine is at
Code:
C:\Program Files\GitWhen ever you found your folder enter it and then you'd see several files and folder, now don't be in a hurry. Find a folder called [cmd] and inside that you should find a file called [Git.exe] select taht and press Open, now lets try configure again.
9.2 Database Errors
Do you see a lot of errors in your Worldserver.exe when lunching? Well that means your database isn't fully updated, lets try to add some more updates, shall we.
Go into your Source folder that we made earlier and browse to a folder called SQL now make a new folder in that directory called anything you'd like, I named mine [MergeAllWorldUpdates],
Img url: http://s13.postimg.org/5kf7v2o47/Merge_All_World_Updates.png
Now in that folder make a Text Document file or if you have Notepad++ open that.
Now paste this into it (Special Thanks to EDB for making the original Merge_Importer!)
Code:
@echo off
:: TABLES PATH SHOULD NOT BE EDITED!
set tablesPath=%~dp0..\updates\world
set tablesPath2=%~dp0..\updates\auth
set destinationPath=WORLD_UPDATES.sql
set destinationPath2=AUTH_UPDATES.sql
:: 0 = Import into your mysql database, 1 = Merge only
echo Do you want to import into your db or merge all files only?
set /p mergeOnly= 0 = Import to your database, 1 = Merge Only:

set mysqlpath=mysql
set host=127.0.0.1
set user=root
set pass=root
set port=3306
set world_db=edb_world

if %mergeOnly% == 0 goto true
if not %mergeOnly% == 0 goto false
:true
    echo This may take awhile, be patient!
    for %%C in ("%tablesPath%\*.sql") do (
        echo import: %%~nxC
        %mysqlpath%\mysql --host=%host% --user=%user% --password=%pass% --port=%port% %world_db% < "%%~fC"
    )
pause
exit
:false
    copy "%tablesPath%\*.sql" "%destinationPath%"
	copy "%tablesPath2%\*.sql" "%destinationPath2%"
pause
exit
Now when the code is entered if your using notepad++ you'd need to do this before saving the file as Batch by selecting Language and Batch, like this.
Img url: http://s2.postimg.org/ho8myoq0p/Save_As_Notepad.png
Then press CTRL+S to save the file or save it manually
If you are using a Text Document then you'd have to press Save As and then write a name, Name it something you'd remember since you might use it more then once in the future, I named mine [Merger_Importer v2] but you'd have to write .bat after the name as well then hit save. Then you will have a text document file and a .bat file, you can delete the text document file if you'd like. Its not needed BUT if you like to edit it yourself I can recommend saving it, however lets move on.
Now open up the bat file we just created and press 1 when it's done loading then hit enter and now you should have 2 new files in your newly created folder one called WORLD_UPDATES.SQL and one called AUTH_UPDATES.SQL now insert them as you did earlier when creating your database, if you do not remember I suggest you to scroll back up and take a look at [Step 6 : Database]!
9.3 Connection Errors
Instructions: In this section I will only focus on Realmlists and Ports!
MySQL.bat Crashing
Now to solve this error we need to first make sure that if you have programs like example [XAMP] installed that your MySQL there is not running because a MySQL.bat crash can be caused by PORT problems. Lets say your using two MySQL.bat of the same kind and settings. The first one will connect to the port that its coded to connect to (default : 3306) and it will load successfully. Now when you open it the second time the second MySQL will crash because its also trying to connect to the same port but its taken so it means it failed to connect to that specific port and that results in a crash.
Now you can solve this in three ways, first and easiest if possible.
Solution 1
If you have any programs that hosts a database, close its MySQL or change their port settings to etc 3306 and your MySQL.bat should run fine.
Solution 2
What is your folder called that your MySQL.bat is located in? Is it anything other then [_Server]? well then that's the issue. the Folder name is required to stay at _Server by its settings. So I highly suggest you to re-change that into its original name. But if you really wish to change the folder name you can follow the Jordy Thery's instructions on how to do so, (Jordy Thery is the creator of this MySQL.bat) in the README.txt file, if you can't fine the file press [HERE] to download it or [HERE] to view it online.
Solution 3
Change the MySQL.bat's PORT settings and how to edit this MySQL.bat's settings is still found in the readme.txt of you can't find it then once again press [HERE] to download it or [HERE] to view it online. Now simply change all the 3306 to another port, suggested 3306.
None of the issues or solutions worked for you? Well then the last advice I can give you is to first open both Worldserver.conf and Authserver.conf and check your Realmlist,
Authserver.conf
Code:
BindIP = "127.0.0.1"
LoginDatabaseInfo = "127.0.0.1;3306;root;ascent;auth"
Worldserver.conf
Code:
LoginDatabaseInfo     = "127.0.0.1;3306;root;ascent;auth"
WorldDatabaseInfo     = "127.0.0.1;3306;root;ascent;world"
CharacterDatabaseInfo = "127.0.0.1;3306;root;ascent;characters"
BindIP = "127.0.0.1"
SOAP.IP = "127.0.0.1"
Find all these and make sure it all have the same values (127.0.0.1).
If it does have all the same values then try looking at your WoW's realmlist settings found in your World of Warcraft directory, then into Data and here we reach a cross road, try entering enGB if and see if you find any file called Reamlist.wtf if not then check in the folder enUS.
Your Realmlist should look like this,
Code:
set realmlist 127.0.0.1
set patchlist eu.version.worldofwarcraft.com
set realmlistbn ""
set portal eu
but if you want to save an additional realmlist (not delete the old you using) you can do this
Code:
set realmlist 127.0.0.1
#set realmlist logon.AnotherServerRealmlist.com
set patchlist eu.version.worldofwarcraft.com
set realmlistbn ""
set portal eu
The # will allow you to store the other realmlist in you realmlist.wtf without trying to log into it.
8.4 Eluna Errors
So you encountered some issues during the Eluna phase huh? Well in this section I will only provide the answer to one error which would be your [git status] result.
So this is what the result should look like :
Code:
nothing to commit, working directory cleanNow, to solve this you can start by shutting down your Git Bash window completely then relaunch it the same way as we did in [Step 2.3 : Optinal Eluna Engine] and try the same command again, [git status]. If this solves your issue then continue on with the tutorial as it keeps going from where you experienced issues. However if it does not solve your issue and the result is something like this.
Code:
Robin@ROBINS-DATOR ~/Desktop/TrinityCore/NewCore (3.3.5|MERGING)Then you'd have to stop the merging since you are no longer doing any merging since we waited the process out, but if you however wanted to speed trough the tutorial I suggest you to slow down and let it take the time that it does. But if you have waited and you know there is nothing that your currently merging, pulling or cloning then you could use this command to stop the event
Code:
git merge --abortWhat [git merge --abort] does is that it aborts all current merging that are running in Git Bash so after that I would check for changes with [git status] and if non have occurred then relaunch Git Bash one again.
Thanks for following my tutorial, Best Regards, Unknown96!
Special Thanks to :
TinityCore.org, Emudevs.com : For Matherial Usage.
http://collab.kpsn.org/display/tc/Requirements : For Image Usage.
[MENTION=1]Tommy[/MENTION] : For Thread Usage
Jordy Thery : MySQL usage
Eluna Engine Developers : Matherial Usage
TrinityCore Developers: Matherial Usage
[MENTION=2]Faded[/MENTION] : Rising the maximum Characters allowed in threads
[MENTION=1024]Neccta[/MENTION] : For creating Forge.
If you have any questions please feel free to PM me or ask them on this forum,
if you have receive any Errors that I do not go trough in this thread, please make a thread in the support section to receive the best support possible.
I also need some assistance from the members on this forum on my own with filling in appropriate information about Database Development Programs such as (Navicat and SqlYog) since I do not have any experience with those programs. What I need is Shortcut information about Execute SQL, Refresh, Import SQL File.
Do you feel like something is missing or left out or even not explained enough or in a good way, let me know in the comments so I then can resolve it, you'd not only be helping me nut also the community for making this thread even better!
Thank you in before hand!
Last edited:
")